
After a new installation of toxiCALL® has been performed, the application will need to be configured to connect to the SQL Server network database “ToxiNet”. The below steps will guide you through the configuration process.
Note: The following steps only need to be performed on those workstations where toxiCALL® is prompting for the database connection information after the application is started.
Start the application by using the toxiCALL® shortcut (shown in the following image) form the workstation’s start menu or desktop. We suggest creating a desktop shortcut if one was not created automatically during installation.
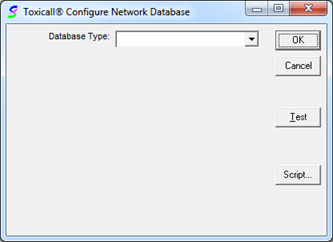
If toxiCALL® is being implemented into a new environment, you will be presented with the “Toxicall® Configure Network Database” window.
Change the “Database Type:” drop down to “Microsoft® SQL Server”.
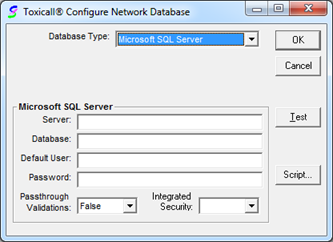
Enter the connection information required such as the server name, database name, username, and password. If you are unsure of the appropriate information to enter, please contact your local DBA (Database Administrator). CAS does not collect or store this information and can only be obtained by your local IT staff.
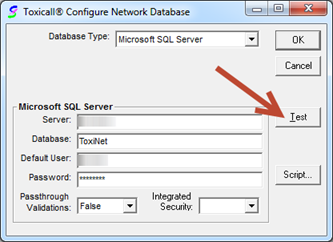
Once you have the informatioin populated as shown in the following image, press “Test” to test the connection information is correct. Please keep in mind the information shown in the following image is for the purposes of this documentation only and does not reflect the settings to be used for your installation or exist in any real production environment.
If the test completes sucsessfully, the following window will be presented.
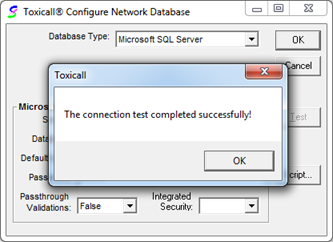
Press “OK” to close the test results window then press “OK” to save the changes made to the “Toxicall® Configure Network Database” window. toxiCALL® will exit and you will be returned to the workstation desktop.
toxiCALL® is now configured to connect to your SQL Server network database.