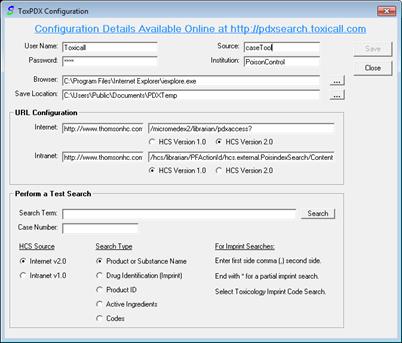
Performing a test search from the ToxPDX configuration window allows you to ensure all configured settings are entered properly.
If you would like to perform a test search, locate the “Perform a Test Search” area of the ToxPDX configuration window as shown in the following screen shot.
![]()

Enter a search term such as a substance into the “Search Term” field such as “Aspirin”.
The case number field is reserved for future use and can be left blank.
Select the appropriate configuration “HCS Source” of “Internet v2.0” or “Intranet v1.0”, whichever you wish to test.
Select the appropriate “Search Type” of the search you would like to perform. “Product or Substance Name” is used in the following “Aspirin” example.
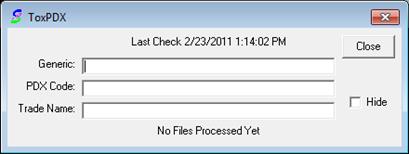
Press the “Search” button to perform the search. A popup “ToxPDX” screen will display and will show product information as it is received from MICROMEDEX®.
Select the product you desire from the MICROMEDEX® lookup screen. Use the “SELECT PRODUCT” (MICROMEDEX® 2.0) or “MOVE TO CASE” (MICROMEDEX® 1.0) button to save the product data file.
Special note for MICROMEDEX® v2.0 configuration:
When a product is displayed on the screen you will see an orange “Select Product” button. You must select this button to initiate the transfer to toxiCALL®.
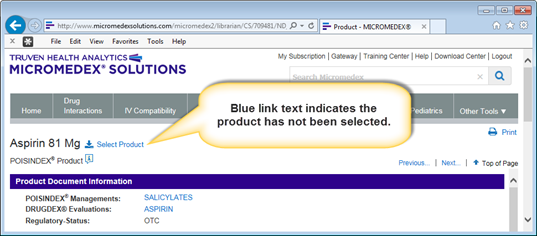
Once a product has been selected the “Select Product” button will turn to a light colored background as shown below.
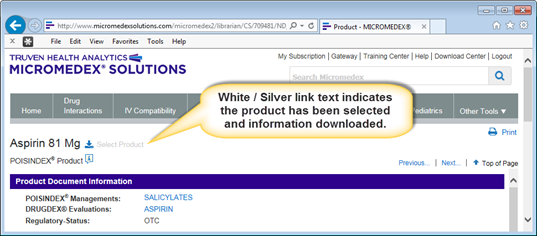
If the “Select Product” link does not change color, your Internet Explorer settings are not configured properly. Please contact Truven Health Analytics for configuration assistance.
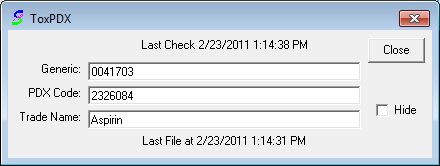
If the settings in the ToxPDX configuration screen are set properly and the Internet Explorer configuration is correct the product information will populate into the “ToxPDX” test screen. The following screen shot displays a successful test where the MICROMEDEX® data has been downloaded and read into toxiCALL®.
