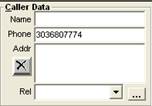
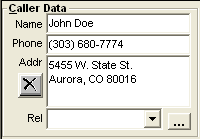
In our first example, we will open a new chart and populate the caller phone field with a 10-digit phone number.
Since in this example the configuration is set to only open the phone lookup window when manually activated, we will need to press “Ctrl+I” (“L”) to open the window while the cursor is still in the phone field.
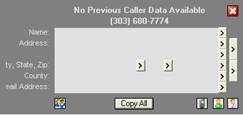
The phone lookup window will open and appear as you have it configured. Currently it is configured to show the field labels as you can see by the “Name” and “Address” labels to the left of the grey areas.
In this example there is no historical data in the database related to this phone number as you can see by the empty results window.
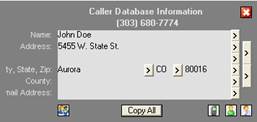
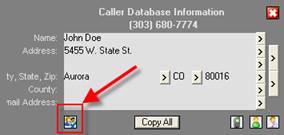
Assuming the chart is populated with the appropriate caller data and saved, the next time the phone number is used in a case, the following information will appear when the phone number is queued.
To copy all the information from the lookup window into the chart, press the “Copy All” button on the “Phone Lookup Window”.
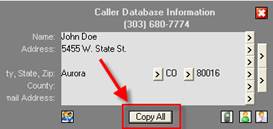
You can now see that the information from the phone lookup window has populated into the caller information area of the chart.
The purpose of this feature is to allow the poison center to save previously populated data for future lookup use saving time and effort.
The phone lookup window configuration settings can be changed on the fly by clicking on the “User Preferences” icon at the bottom of the phone lookup window.
The phone lookup window also allows users to toggle between the caller information, patient information, and PMD information if the phone numbers vary.