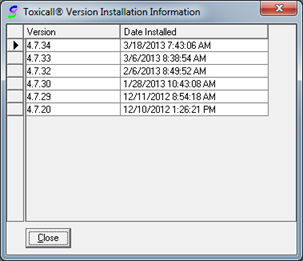
1. Perform the TOXICALL® upgrade on one workstation and verify the installation completed successfully by running the application. As you can see in the below screen shot, the “Installation History” of TOXICALL® reflects a workstation has been started with the new version. The “Installation History” window can be accessed by closing any open case and search windows then selecting “Help” then “Installation History”.
a. If you are running a Beta Version of TOXICALL® the version table is not updated and the AutoUpgrade will not function with Beta Versions.
![]()
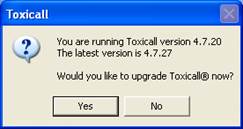
2. Start TOXICALL® on any workstation not running the latest version and you will be prompted if you would like to upgrade to the latest version. Press “Yes” and the installation wizard will appear on the screen after a short delay. The delay may vary depending on your environment and network speeds. On a local system benchmark, this delay was about 30 seconds.
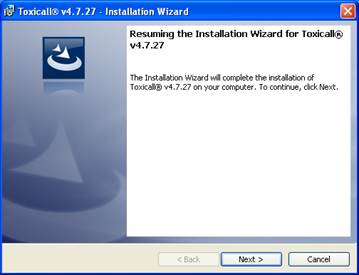
3. Follow the on-screen prompts to complete the installation wizard. You should only need to press the “Next” button one time and the rest should be automated for you.
4. Once the installation completes, TOXICALL® is ready for use.
5. Continue to run TOXICALL® on any workstations that are not upgraded to perform the Auto Upgrade.