The look and feel of the ToxPDX “Interactive” window can be customized to your liking by referencing the following steps.
1. Perform a substance or product lookup while configured to use the HCS Web Service configuration option. The ToxPDX “Interactive” window should appear. The following image shows the Interactive window displayed.

2. Select the configuration icon located in the upper right hand corner of the Interactive window.

3. The Interactive window configuration options will appear as shown in the following image.

Color:
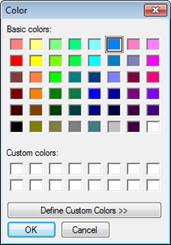
1. Select the “Color” button to change the Interactive window’s color. A color selection window will appear.

2. Select a desired color and press “OK”. The Interactive window’s color will be updated accordingly.

3. Select the configuration icon to collapse the Interactive window’s configuration options and return the widow to its normal state.

Opacity:
1. Use the opacity slider to adjust the opacity of the Interactive window.

2. Adjusting the slider to the left will increase the opacity. Adjusting the slider to the right will decrease the opacity. The following image displays the opacity slider adjusted half way.

3. Select the configuration icon to collapse the Interactive window’s configuration options and return the widow to its normal state.

Reset Configurations to Default:
1. Select the “Reset” button to reset the Interactive window’s color and opacity back to defaults. The following image displays the location of the “Reset” button.

2. After selecting the “Reset” button, the Interactive window’s appearance is set back to defaults as shown in the following image.

3. Select the configuration icon to collapse the Interactive window’s configuration options and return the widow to its normal state.
