After an archive database has been created, you will need to set up a new pointer to the database within TOXICALL®. This will allow you to access the archive database from within the TOXICALL® application. Please complete the following steps:
1. Log into TOXICALL® with supervisor rights.
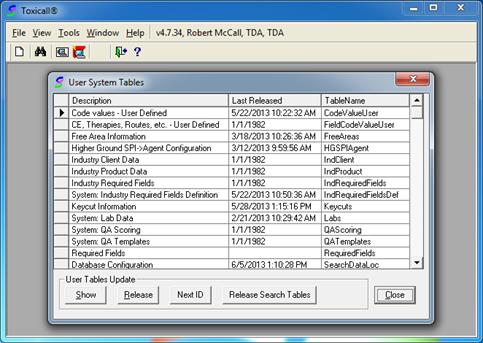
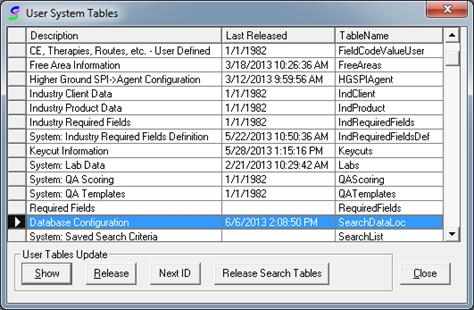
2. Select “Tools” > “System Tables” > “User System Tables”. The “User System Tables” window will open.
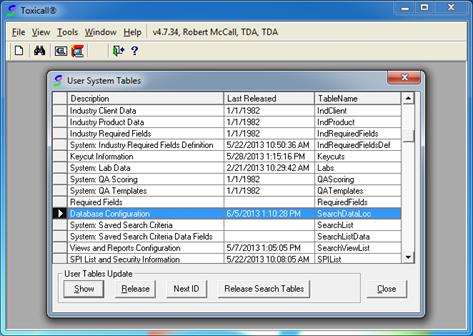
3. Locate the “SearchDataLoc” user system table (description of “Database Configuration”) and double click the entry to open the table for edits.

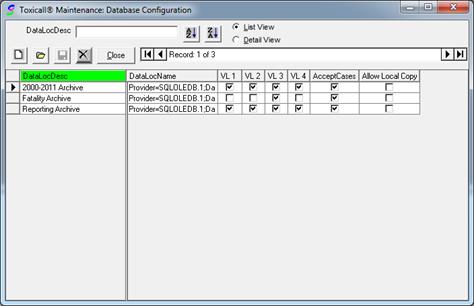
4. With the table open for edits, select the “New” icon to create a new entry.

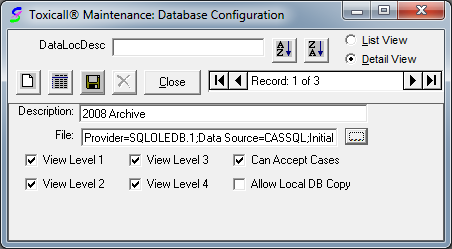
5. Enter a description into the “Description” field. For example, “2008 Archive”.
6. Set the view levels desired. For example, if only view level 4 is set, only users with view level 4 permissions will be able to access the archive. If you set all view levels 1-4, all users will be able to access the archive, etc.
7. Leaving the “Can Accept Cases” check box checked will allow the archive to accept cases.
8. The “Allow Local DB Copy” option allows cases to be downloaded from the archive database directly to the local database bypassing the network. This option is not typically set unless there is a specific need. A typical setup will leave this option unchecked.

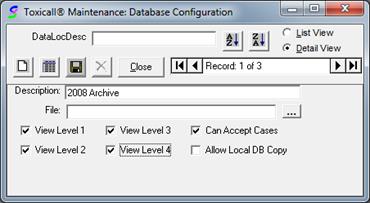
9. Press the 3-dot lookup button for the “File” field to set the connection settings to the new archive database.
10. Enter the connection settings provided to you by your DBA. (See section “Create an Archive Database” for more information.)
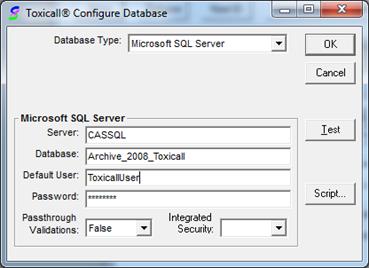
11. Press the “Test” button to ensure the connection settings are correct and the proper database table structures exist. If the connection test fails, please contact your DBA and ensure the connection settings are correct and the workstation can access the SQL Server instance properly.
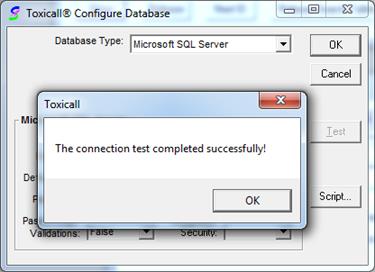
12. Press “OK” to the test confirmation message then press “OK” to the “Toxicall® Configure Database” window to save the settings. The following image shows the completed setup.

13. Press the “Save” icon to save all settings then press “Close” to close the window.
14. You will be prompted if you would like to mark the table for release. Press “Yes” to marking the table for release.
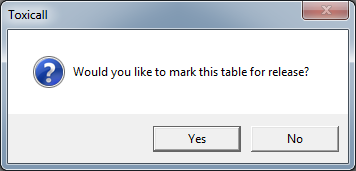
15. A second prompt will appear confirming you would like to mark the table for release. Press “Yes” to the confirmation.
16. Press “Close” on the main “User System Tables” window to start the release process.

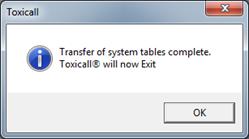
17. Once the table release process completes, you will be prompted to exit TOXICALL®. Press “OK” and TOXICALL® will exit.
18. Re-start TOXICALL®. The archive database is now configured within TOXICALL®.