To add data fields to a report, please complete the following steps. The below example is a continuation of the ongoing example within the Report Designer documentation.
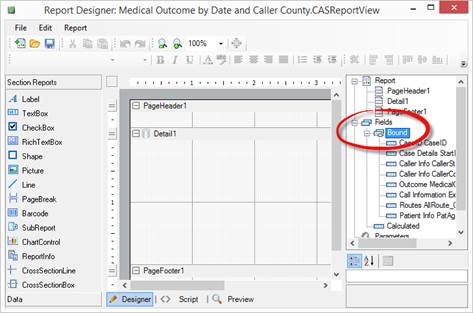
1. With the report designer window open, locate and expand the “Fields” node within the settings pane. Next, expand the “Bound” node to view all data fields available for the report.
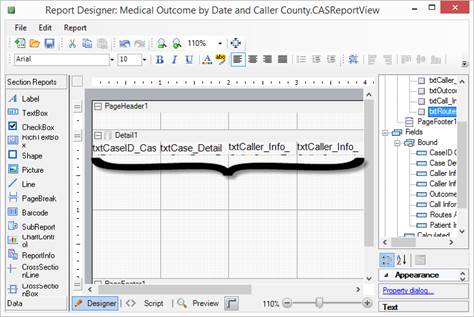
2. In this example, we will drag and drop each field side by side into the “Detail1” section. The grid will assist you with snapping each field into place in an aligned fashion.
3. After the fields of interest have been added to the report. We will need to provide labels (or in this case, more like column header labels) to each field. Select and drag the “Label” item from the left side “toolbox” area and place it above the first field.
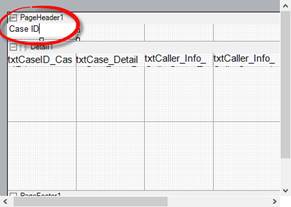
Tip: As soon as the label is placed, you can immediately begin to type the label text. In this example, we place the label, then immediately type “Case ID” on the keyboard.
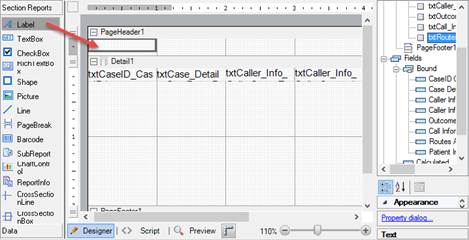
“Case ID” typed for the label text.
4. Alternately, you can update the text of a label through the properties of the label itself as shown in the following image.

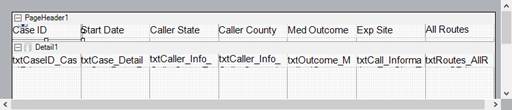
The following image displays the report with all labels applied and updated to reflect their respective fields.