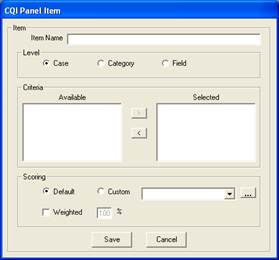
In the “Item Name” field you will enter in the name of the first item. Notice that just below the “Item Name” field is the “Level” selection area. Each item in the CQI panel can be reviewed at the case, category, or field level. Keeping this in mind while naming your items will assist you in properly choosing the correct item names.
The first item that will be created in this example will be a “Case” level item. For example the name of the item may be “Overall Completeness” and the level would remain at “Case” level.
The next area is the “Criteria” area. The “Criteria” area is used when the level is either “Category” or “Field”, these items will be discussed later on in this document under the “Category Level Item Criteria” and “Field Level Item Criteria” sections.
The next area is the “Scoring” area. The “Scoring” area is where you will determine how you would like to score the item.
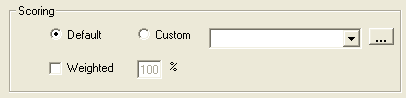
Leaving the scoring as default will allow the user reviewing the case to score each panel item using the default scoring method options below.
•0 – Not Scored
•1 – Inadequate
•2 – Adequate
•3 – Excellent
Checking the “Weighted” check box will indicate that you would like this item to be weighted on the CQI panel and will activate the “percentage” field which can be modified as desired. For example, if you would like the item to be weighted as 10% of the entire panel, you would type “10” into the “percentage” field.
Selecting the “Custom” radio button or clicking the “Custom” 3-dot lookup button will enable the ability to load a custom scoring schema previously created. For more information on custom scoring please see the “Custom Scoring” section of this document.
In this example, the scoring for this item will be “Weighted” at 100% of the overall panel.
Press the “Save” button to save the item.
Once “Save” is pressed you will be returned to the CQI Manager window.