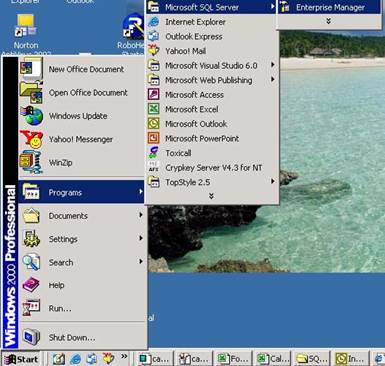
Once you have installed SQL Server, and applied all patches from Microsoft, you will need to configure your SQL server. To configure your SQL server, you will need to open the SQL Server Enterprise Manager. It can be found like this:
When the Enterprise Manager pops up, you should see a screen like this:

Registering Your SQL Server
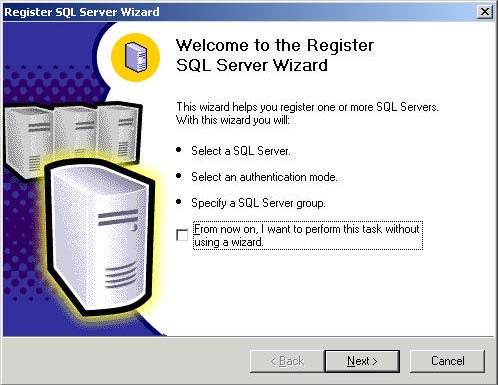
The next step is to register your SQL server. From the SQL Server Enterprise Manager Console, click on the Action menu, and choose New SQL Server Registration. This will open up the Register SQL Server Wizard.
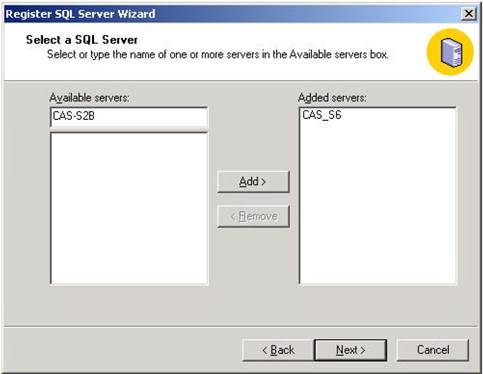
Click Next to advance to the next screen which allows you to select your computer’s name for registration. In this example, a computer named cas-s2b will be registered. Notice the computer cas-s2b is listed under Available servers. If your computer’s name does not appear here, it should be displayed in the console column list.
Double click on your computer’s name (or you can click once on the computer name and then press the Add button in the middle of the screen). This should move your computer’s name to the right side of the screen. Advanced users can also type in the IP address of the server.
Click Next to go to the next screen which asks you to specify the authentication mode you will be using. If you will be using the recommended implementation (Windows Authentication), you can simply click on Next. If you have decided to deviate, click on the SQL Server Authentication and an additional window will pop up asking for user name and password. You will need a valid SQL Server user ID and password to enter here. Click Next two more times and then click Finish. You should get a pop up window showing that your SQL Server has been successfully registered. Click the Close button. Your server is now registered and accessible through the GUI (Graphic User Interface) in Enterprise Manager.